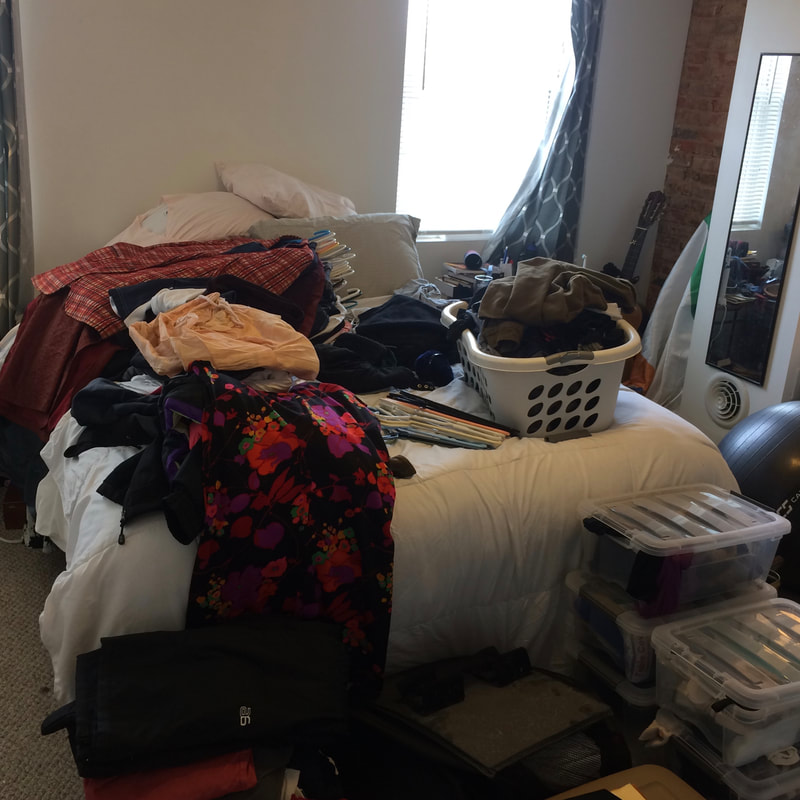
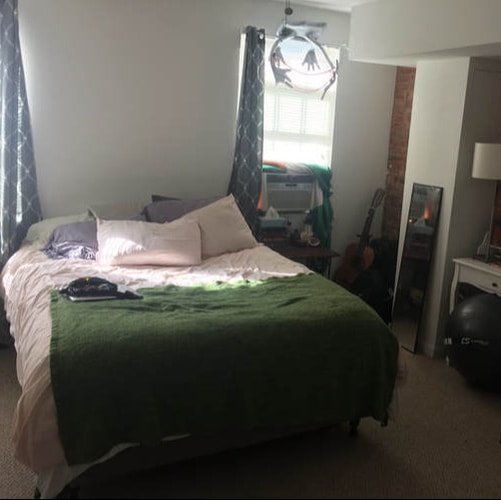
 Chilly October has officially arrived! It’s the time of year for blazing sunset skies and spicy hot drinks, but also, the best time to open the windows and air out the house while getting ourselves (and our spaces) ready for the avalanche of busy fall schedules, weekend trips to fall festivals, sports Sundays and family holidays to come. The last week of September was pleasantly filled with birthday projects- that is, projects that my clients wanted to tackle to celebrate their birthdays. In the next few posts, I'll be sharing all that my clients accomplished and give you a bit of an insight into how Zen Method helped these birthday ladies start off their new year on this earth on the right foot! Hopefully I’ll also inspire you to take on a project you’ve been holding on the back burner! The first project was a last minute move-in and house restructuring; the second was the purge and organization of a walk-in master closet - both yielding amazing results! This post will be a breakdown of the last minute move-in project, completed in two sessions. The Last-Minute Move: A lovely friend of mine recently decided to cut her solo lease loose to move in with her boyfriend and his two roommates in another part of Philadelphia. While the decision wasn’t entirely last minute, she also started a new job with completely opposite hours than her previous job and her boyfriend had a family trip across the pond scheduled for the day after the planned move-in date, so she simply couldn’t achieve a long-planned, super organized move. The priority was to get out from the old place and into the new place, period. It was a huge undertaking, but they did it! In the two days before her boyfriend’s flight, they hauled boxes, bins, bags, furniture and armfuls of everything she owned into carloads and successfully relocated her life across town, filling every inch of floor, table and closet space available in the new house. This left quite the chaotic environment during a time that any sane person would need for adjustment to new schedules, new commuting patterns and her new job! Simply put, they needed a Zen Method. Badly. Project Assessment: So, this is where we started: 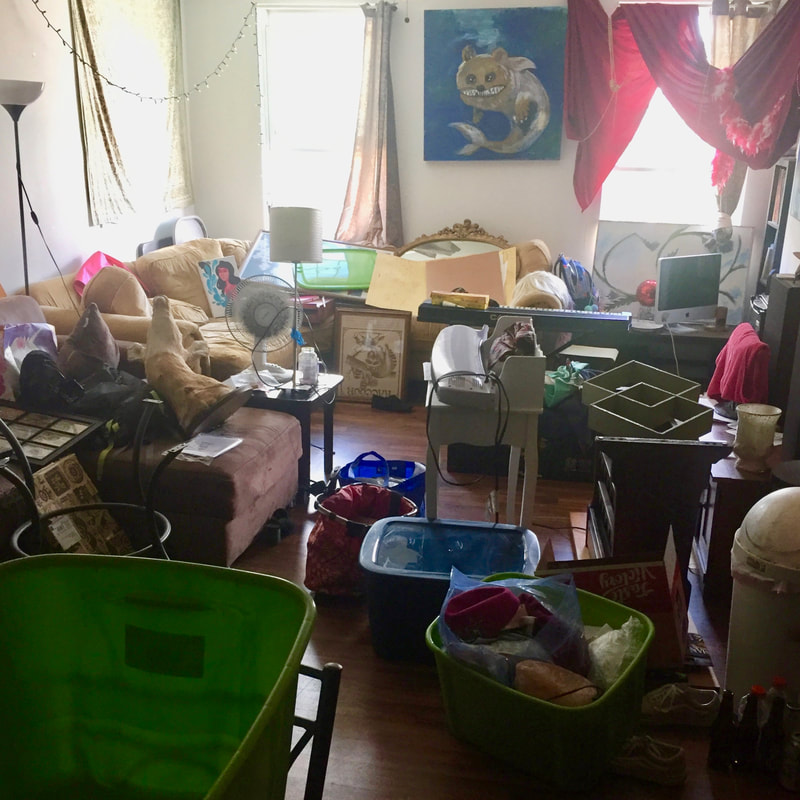 The rest of the house looked overwhelmingly similar, as she had only been able to unpack things that were immediately needed and able to be located. The upstairs laundry room, hallway and bedroom looked about the same and exuded a bit of a “bachelor” feel, after all, it had primarily been a bachelor pad until now! During her project assessment walk-through and a french press of coffee, we discussed her needs (as I do with all clients): First and foremost, making the newly combined bedroom space more fit for two people (and their puppy dog) with all of their needs and interests, which included: * Making sure that there was enough space for both she and her boyfriend’s needs in the bedroom space * Getting rid of old, unused furniture currently taking up space * Arranging the bedroom to be bilateral while keeping electronic and wired hookups functional * Highlighting the (gorgeous) brick wall elements in the room for more than just a laundry/hideaway corner (Before pictures of the bedroom and hallway not included at client’s request. It’s OK lady, we’ve all been there, no judgements!) Her secondary concern was for the downstairs living room/common area, shared by roommates and their guests, these intentions included: * Unpacking and organizing the overflow in the hallway and downstairs common living space * Creating a dedicated studio workspace in the common living room area while allowing ample space for the other roommates and their guests to enjoy a dedicated common living/entertainment space Organization Session #1: After agreeing that we should focus on one space at a time and split the projects into two sessions to give our full attention to both the bedroom space and the living room space, we got started. A Quick Downsize: We started in on giving the house it’s much needed Zen Method, starting with a quick downsize of things that were trash/unused/unneeded and collecting obvious things for a “to-go” donation pile, which started, to my surprise, with an entire couch! 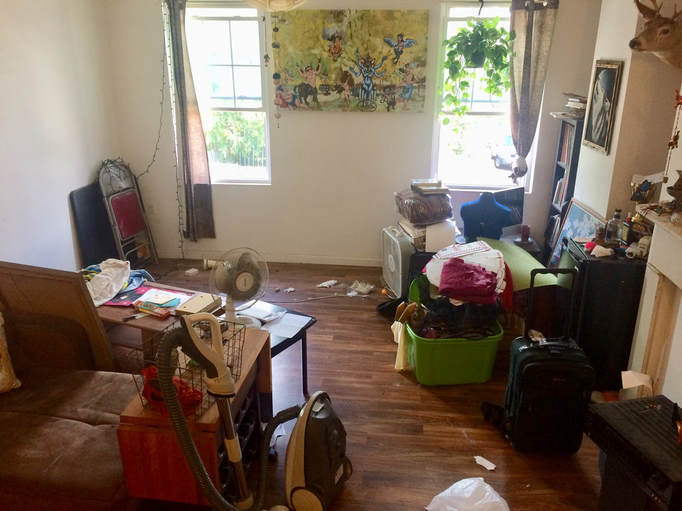 Once depositing a trash bag in each room and trimming the immediate excess, we went to the bedroom to start breaking it down and emptying it out. With the express agreement and permission from her boyfriend (consent and respect is important people) and welcomed heavy lifting help from one of her new roomies, (thanks again Charles!), we began wiping down, disassembling and removing everything from the room except the bed and a sitting chair. What could be relocated to the “to-go” pile* left the room, never to return, and the rest took a trip out to the hallway while we decided how to rearrange the room for better flow and use. A few words about “to-go” piles: It is important during larger, more complex projects, to designate space away from the main project space for things that will be leaving the space entirely. Whether furniture, emptied boxes, donation items, etc., I choose an easy access point (such as next to exit doors or stairs as long as it is not obstructive) and always leave room for a natural walkway in case immediate removal isn’t able to happen until the next trash pick-up day. In this case, smaller items went to the “couch pile” downstairs, while the larger, heavier furniture was stacked neatly next to the stairs. Always, always, ALWAYS ask for help to move anything you have trouble moving yourself. Adding unnecessary bodily injury to a house still being unpacked is the worst. Clean your space before you start the organization/design process: After a bit of tidying, dusting, vacuuming and unplugging of electronics, we gave the room a much healthier arrangement and began repopulating the fresh space for it’s needs while giving both she and her boyfriend their own sides of the room to function. By placing the bed at the midline of the room, instead of taking up an entire side of the room as it had been, they could each have access to a window, bedside table, lamp and place to set a glass/book/charging device/etc. without having to reach over each other. It also left room for a full sized trashcan to remove the need to walk to the bathroom to dispose of trash. If you’re not sure if it belongs there, it probably doesn’t: Relocating the things that didn’t belong in a bedroom (skis, sports equipment bags, shoe boxes, forgotten socks from years past) suddenly provided space for a bureau of drawers that could also house the entertainment and gaming systems, making the space dual functional. (Efficiency! Huzzah!) A sitting chair fit naturally next to the bureau and instantly, a sitting area separate from the bed was born! The two brick wall out-coves that had previously collected laundry, darkness and dust became perfect housings for a mirrored vanity (complete with his exercise ball for a seat, dual purpose everything!) and the other for her boyfriend’s musical instruments and cases, maximizing the small spaces and accenting the room instead of distracting from it. Just a reminder: always measure spaces BEFORE hauling a piece of furniture into it, unless you like disappointingly hauling furniture back DOWN the stairs you just hauled it up, of course. Once the bedroom was arranged, redressed and all electronics reconnected (taking pictures of how everything is connected BEFORE disconnecting is very helpful) we moved on to making sense of the smaller item unpacking.  (This is a very simplified example, but quick phone pictures of back of televisions, gaming systems and modems/routers can save you from a time consuming afternoon of trying to remember what connection goes where after the fact. You can also label wires by writing on painter/masking tape that's then folded around the wire and back onto itself. This is useful for scenarios where many of the wires look the same, many similar strategies exist) Use common sense: Since her belongings were packed last minute with no particular categorization in mind, it became a pretty steady game of “Where would a family of things of [this] nature live?” Simply picking up each thing, one at a time, considering its purpose, need and specifically where it would be useful and most helpfully accessible eliminated the confusion of the clutter with each box unpacked. Clothing? Easy! Bureau, closet or laundry. Hair care? Bathroom or wherever it is used most often. Art and design supplies? Take to the common area to be stored with crafting supplies. Wall art? Decide where you’d like it to be displayed, place on the floor below that area on the wall and when you have an hour or so, simply go from one to the next with the appropriate hammer/nail/screwdriver/screw or command strip hardware and hang each until it’s all up! By being able to quickly “common-sense” each thing that came out of a box or bag, we were able to not only keep strictly bedroom-related things in the bedroom and non-bedroom things wherever they belonged, but make sure that the new bedroom arrangement had enough free space to enjoy it without unnecessary distraction. The result, while simple, was amazing and she and her boyfriend were blown away by the transformation and new functionality of their new, shared bedroom.
 Organization Session #2:
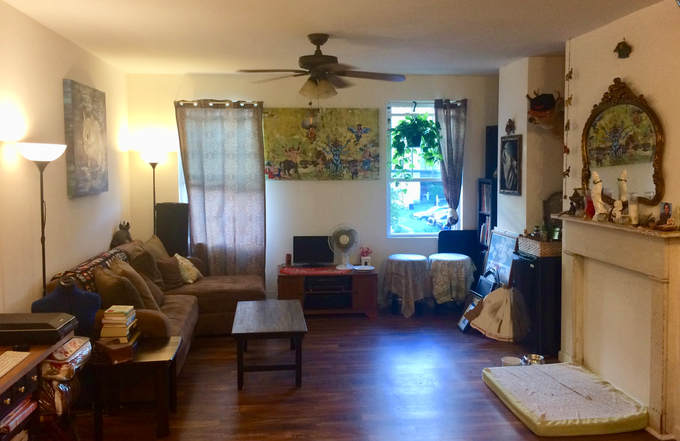
For the downstairs living room/common area, we applied the same technique of removing obvious trash, removing the extra couch mentioned earlier and other unused furniture, clearing the room, doing a quick vacuuming and wipe down of surfaces to start with a fresh empty space. During our walk-through consultation, she mentioned that she intended to set up her studio and workspace in a small section of the common living room, while allowing the majority of the space available for housemates to gather without one inhibiting the other. Since the room had previously been populated with more furniture than was needed or used, once removed, it was an easy game of measurement, placement and accentuation of the space with the remaining furniture. After choosing the appropriate space along a wall of the room for her studio workspace, we began to organize her studio supplies, computer set up and finished unpacking the remaining boxes. By the time her boyfriend and roommates began returning home, we had put the finishing touches on the living space and everyone was shocked at the transformation: My client was a trooper and we managed to do all of this, start to finish, in just two 5 hour sessions, with obvious success! With help, some good dedicated teamwork and focused time, my client’s Zen Method was achieved, impressing not only herself, but her boyfriend and all of the roommates, too! She plans on booking another session to establish an improvised extra closet space in the upstairs hallway, organize her clothing and accessories to put the final feelings of home functionality together. I hope this story has inspired you to know that with Zen Method Philly, you can move mountains (of stuff, in this case) in no time at all and overcome even the most impossible seeming organization projects! Be sure to let Zen Method Philly know if you need our help and be sure to check back for the next project breakdown! Be well and continue live in the light, Shea Zen Method Philly Copyright (c) 2018 |